Updating a job is easy. This guide will show you how.
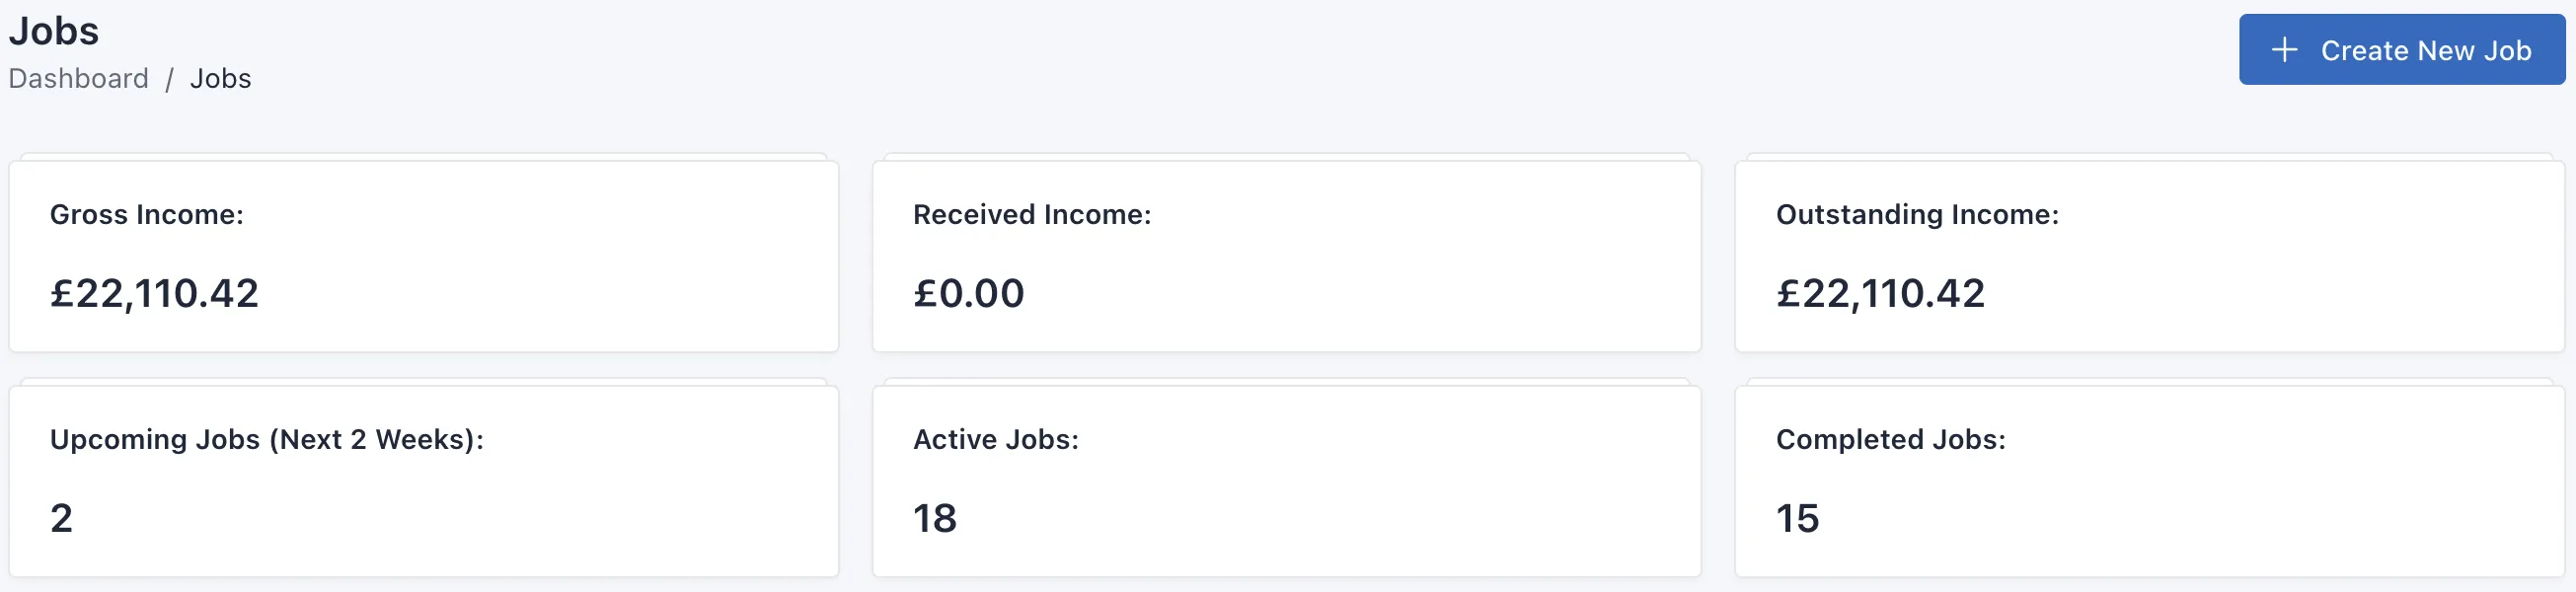
Once logged in, navigate to Jobs. Here you will be able to see all of your existing jobs. On the jobs page you can see some handy stats such as:
- Gross Income
- Received Income
- Outstanding Income
- Upcoming Jobs (Next 2 Weeks)
- Active Jobs
- Completed Jobs
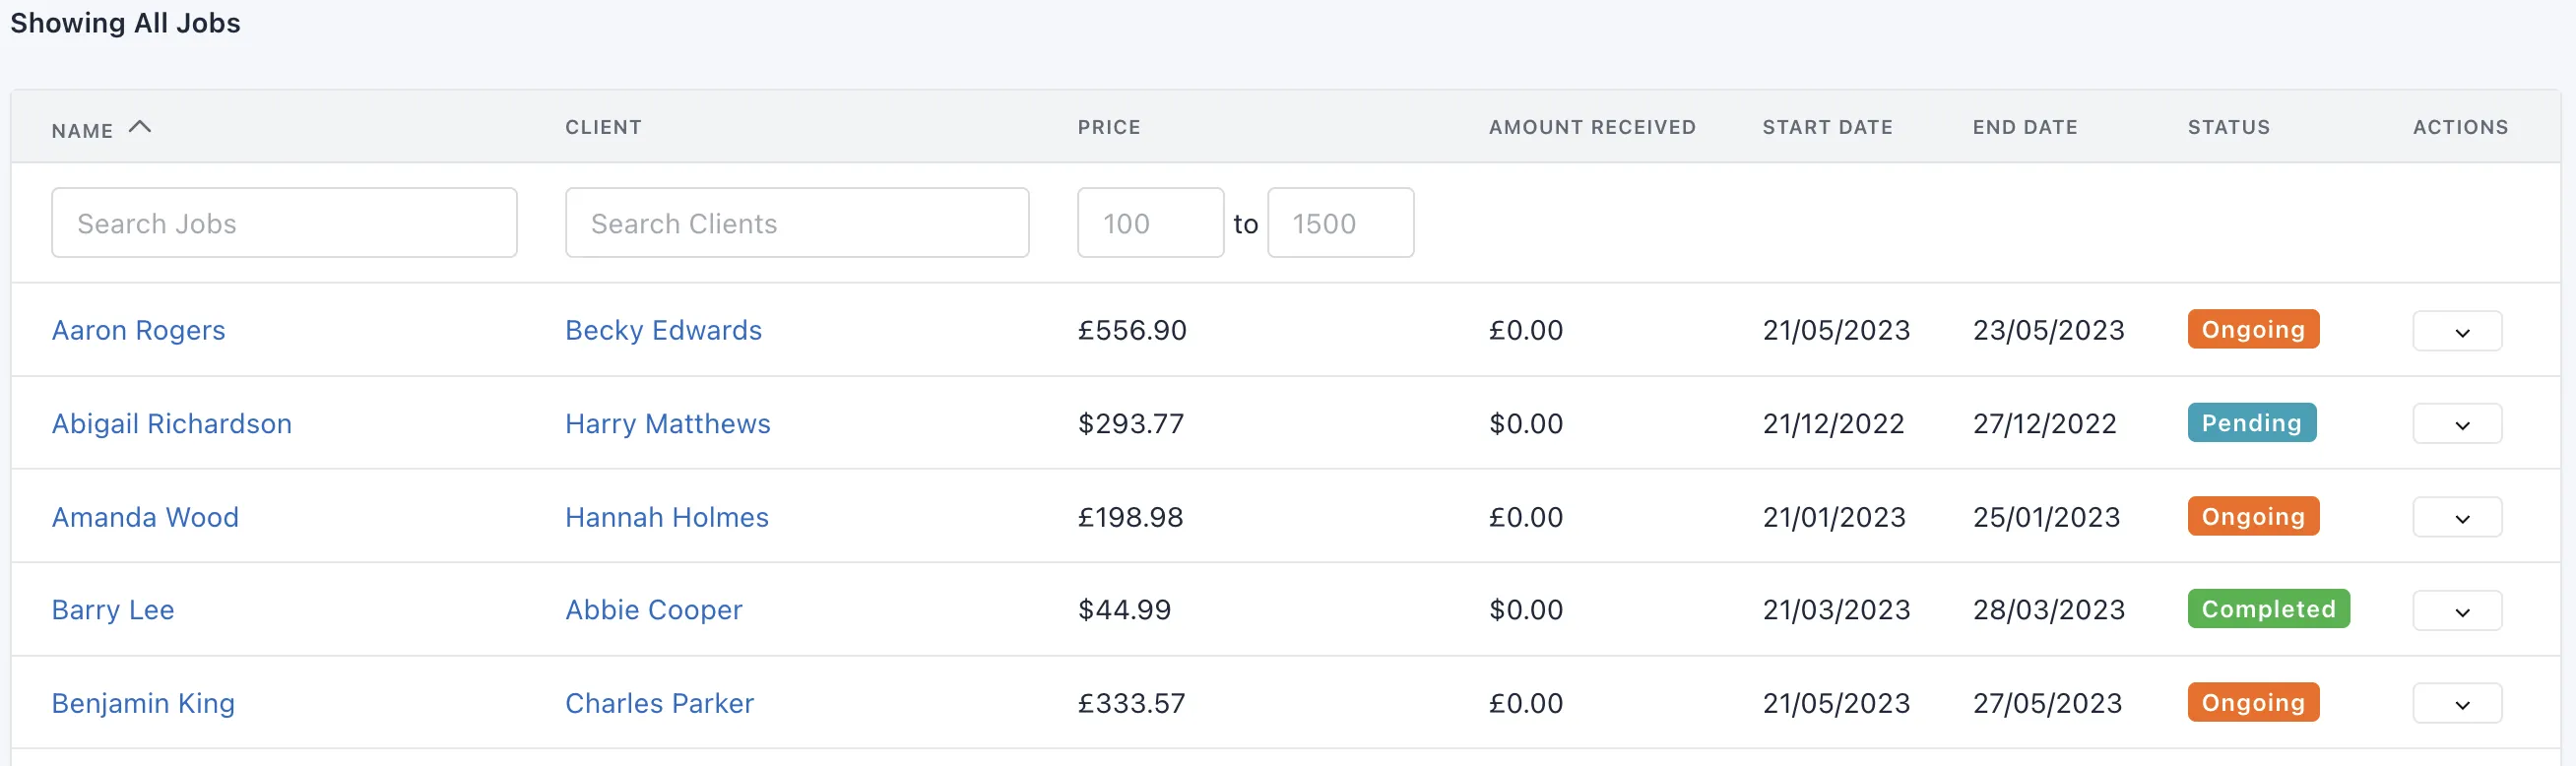
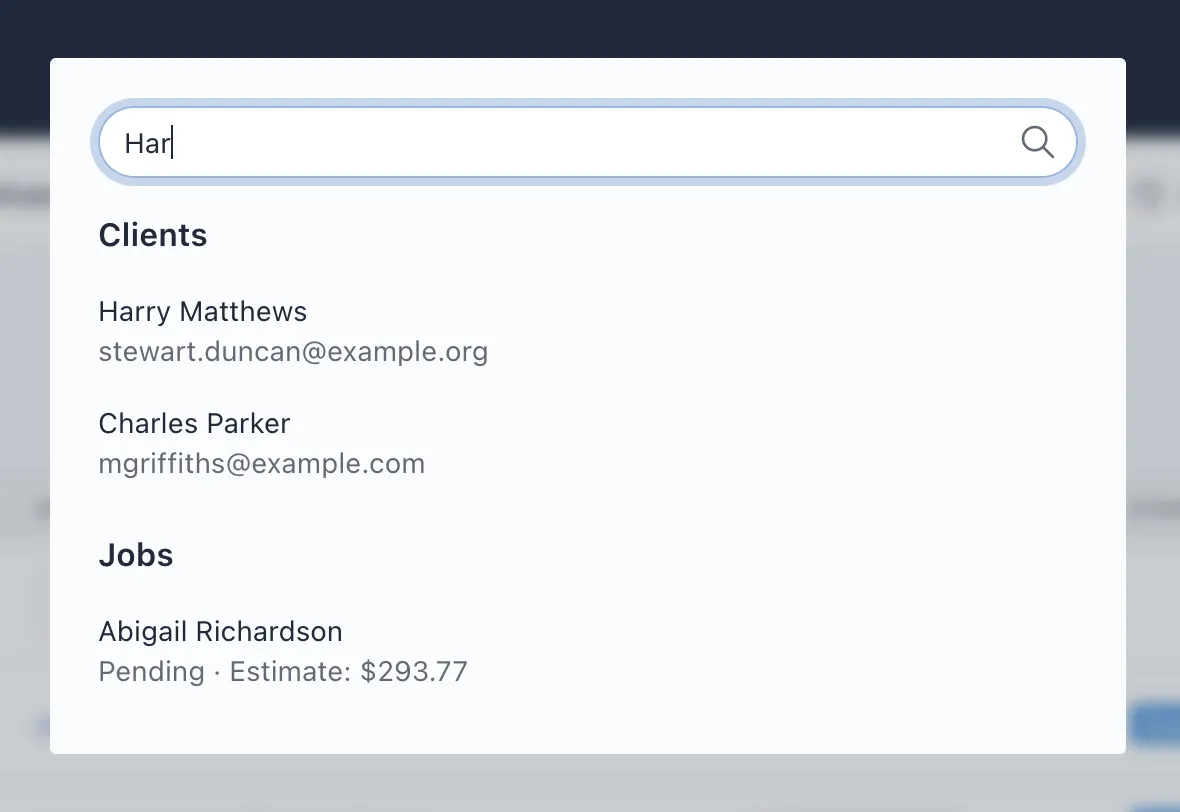
You can use the search boxes to search through your jobs by their name. Alternatively, you can use the global search feature, which is the magnifying glass icon located at the top right of the page, next to your business name. This will show any clients, jobs, estimates or invoices that match your search query.

Once you've found the job, on the far right hand side of the results table is an "Actions" button. Clicking on this will show a drop down menu. From the list, click on "Edit".
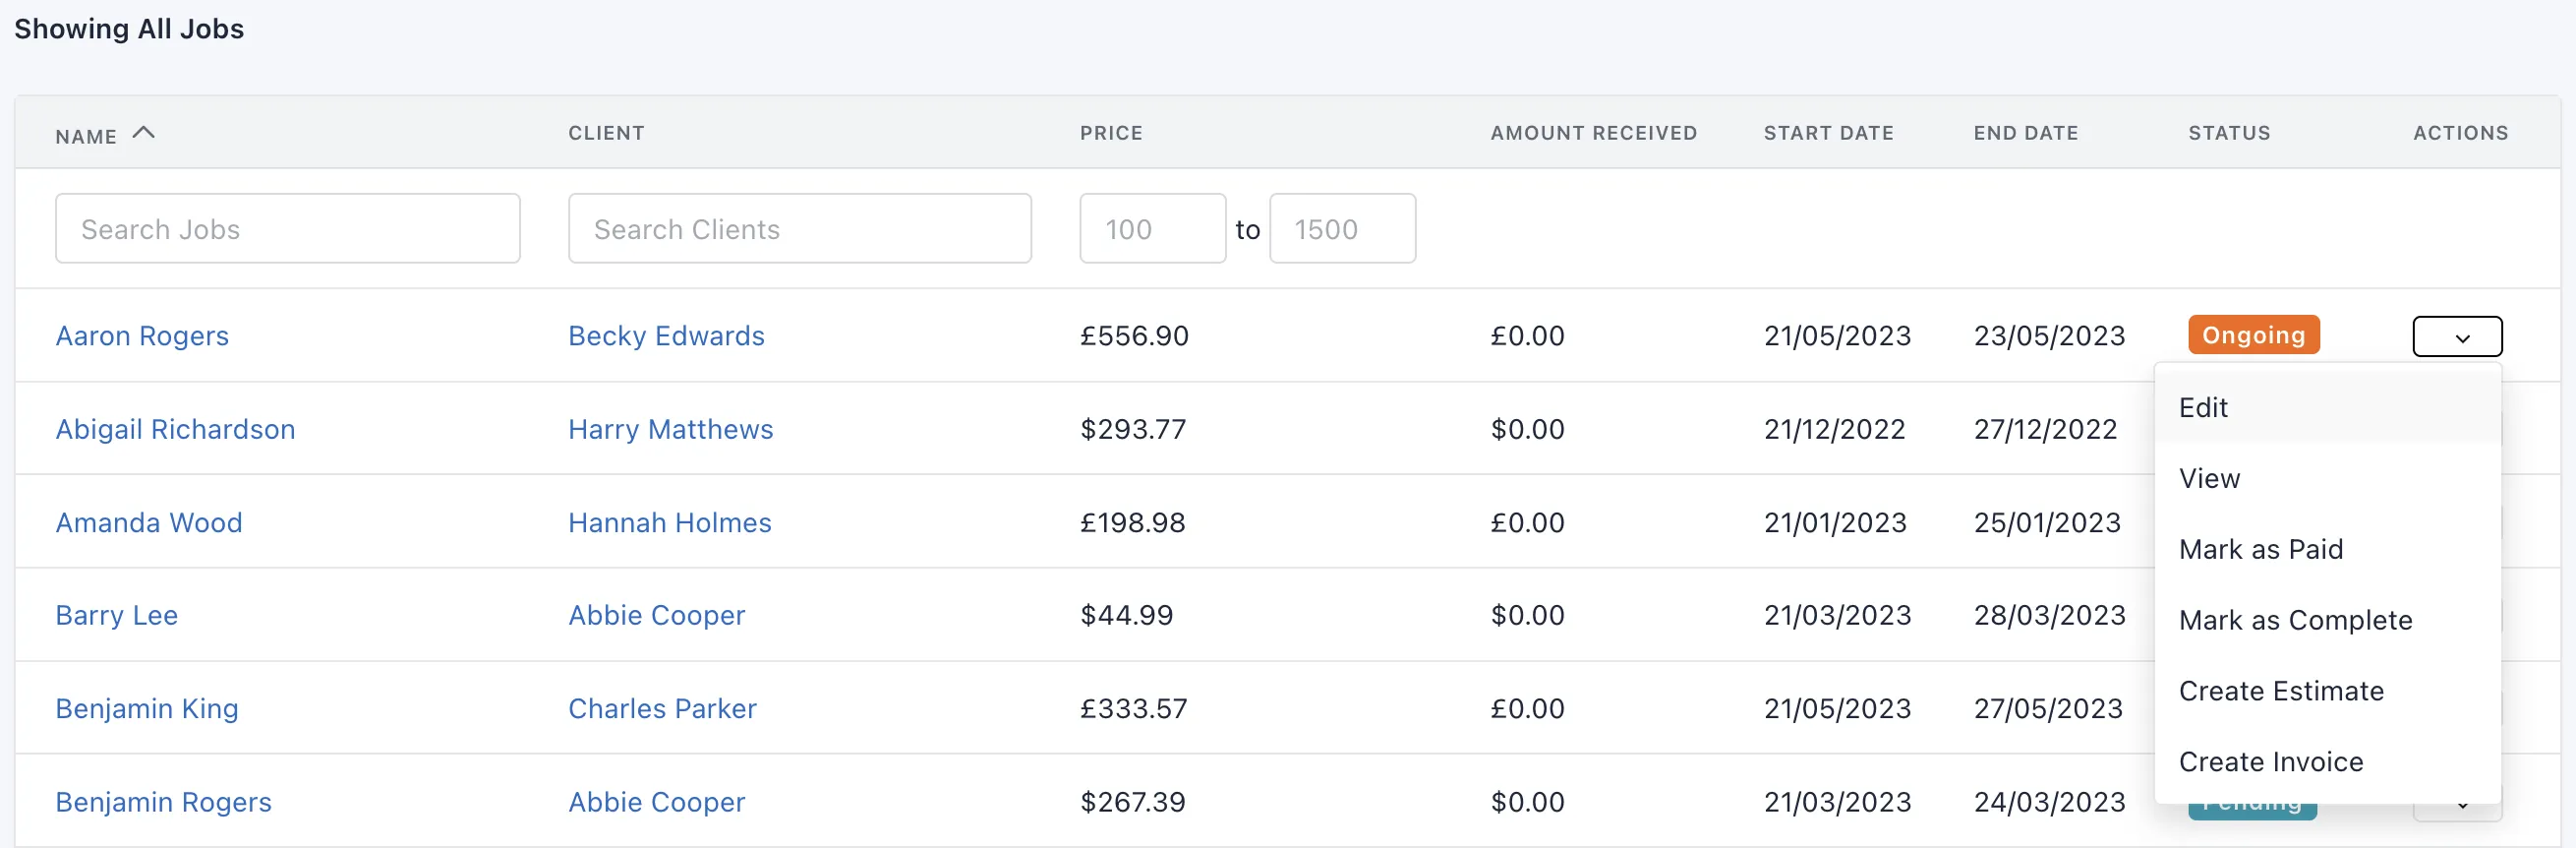
On the edit job page, you will be able to change any information, however fields marked with an asterisk (*) are required and cannot be left empty.
There will also be 2 new fields present when editing your job: Status and Amount Received. Status allows you to set what status the job is in, pending, ongoing or completed. By default all jobs are created with a status of "pending". You can update the Amount Received field when you have been paid for a job.
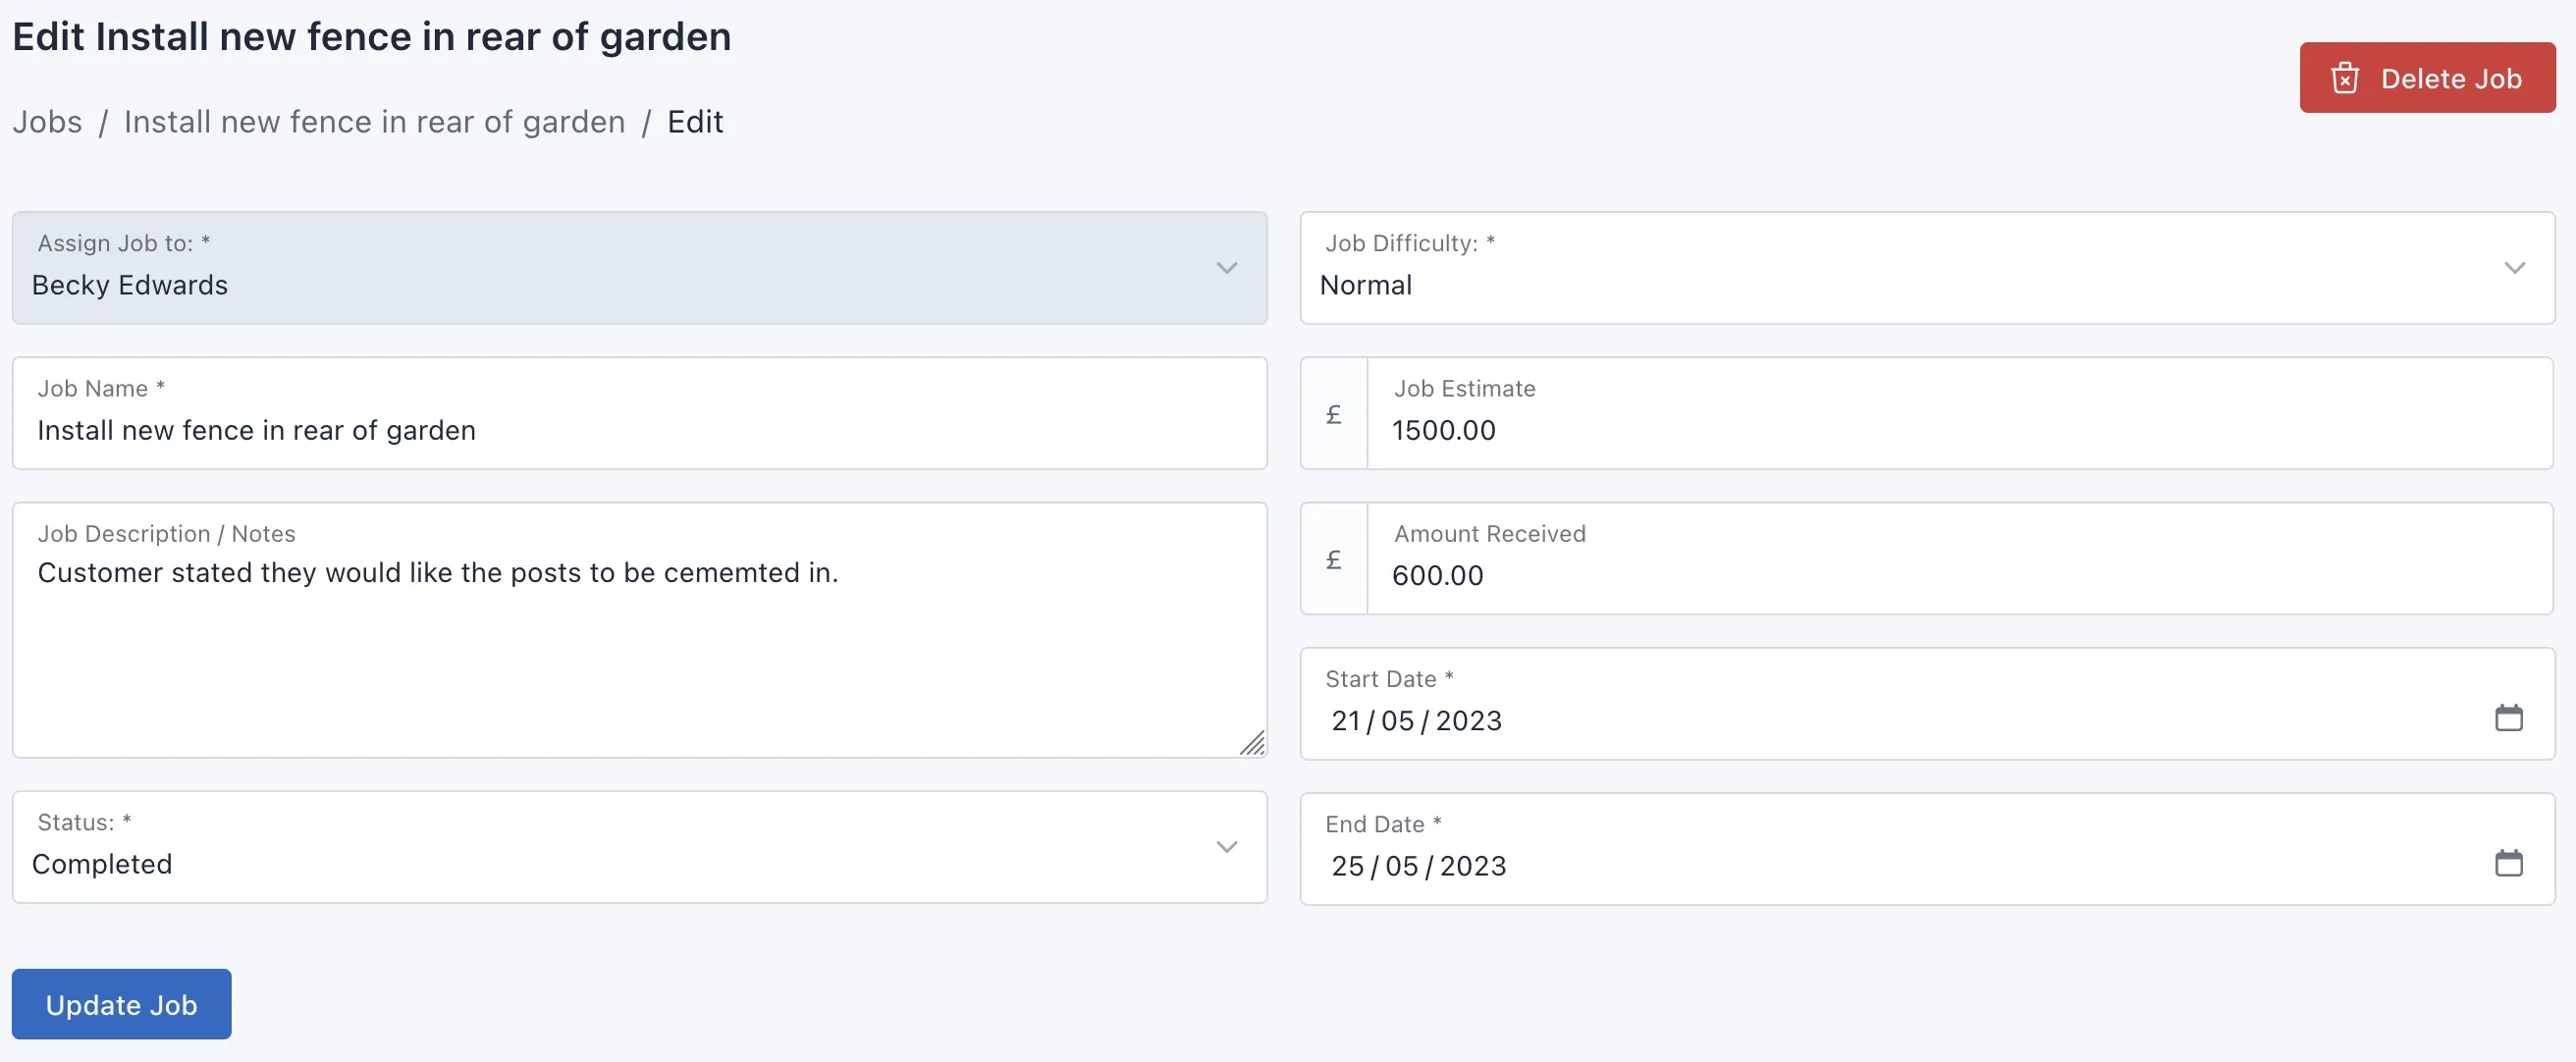
Once you are finished making your changes, click the Update Job button to save your changes.
If required, you can delete a job. Using the Delete Job button at the top right of the page. Please note that deleting a job will also delete the following:
- Estimates
- Invoices
- Hours logged
Deleting a job and all of the above is permanent. You won't be able to restore them.